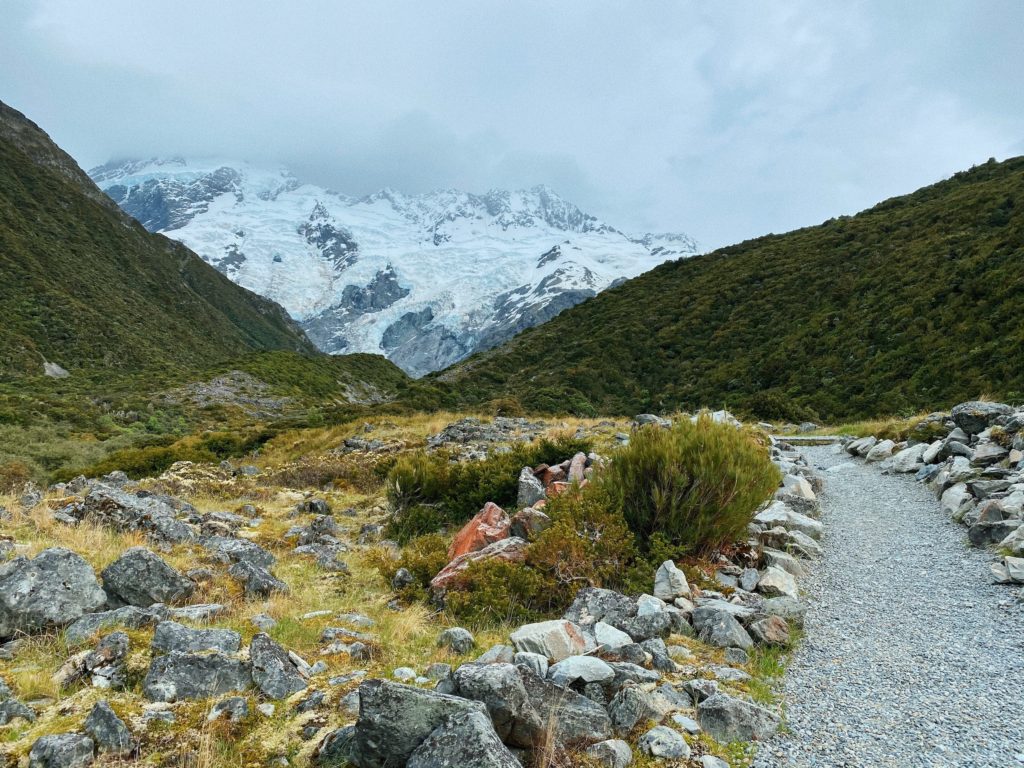
Yesterday, I decided to set out on the Mueller Hut route: a beautiful and extremely popular New Zealand hike through alpine terrain. At its peak is the Mueller Hut, which you can book ahead and spend the night in — or, you can hike it all in one day, which is what I did. Ben had plans already this day, so I woke up early, loaded up the car, and drove the 45 minutes to Aoraki Mt Cook National Park alone.
Disclosure: Some of the links below are affiliate links. When you purchase through links on my site, I may make a small commission (at no extra cost to you!).
General information
- Difficulty: Hard
- Elevation: 1800 m / 5905 ft
- Elevation gain: 995 m / 3263 ft
- Length: 10.4 km / 6.5 mi return
- Time: 7 – 8 hours total
The Mueller Hut and the accompanying route is located on Mt Ollivier, the first mountain that Sir Edmund Hillary ever summited. The route starts at the White Horse Hill campground and follows the Kea Point Walk for a bit before diverging. The Mueller Hut route is an extended version of the Sealy Tarns track, which ends about halfway before you reach the Mueller hut.
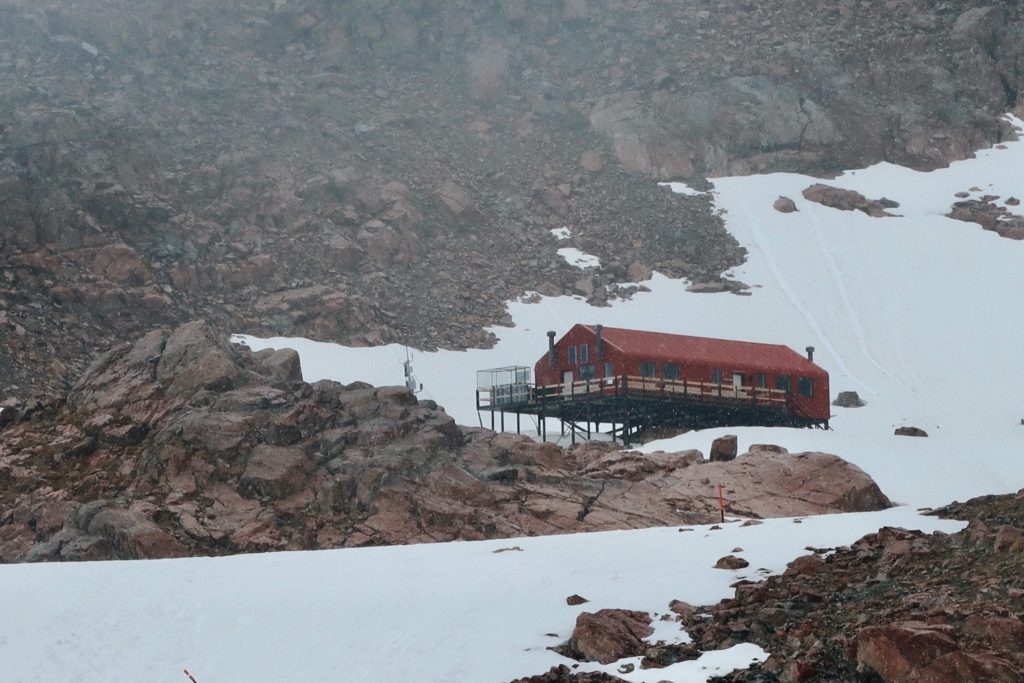
If you want to stay in the hut overnight in summer (November through April), you’ll need to book in advance online. It costs NZ$45 per adult. The hut has 28 beds, a communal cooking area, and drop toilets.
Mueller Hut day hike: Part 1
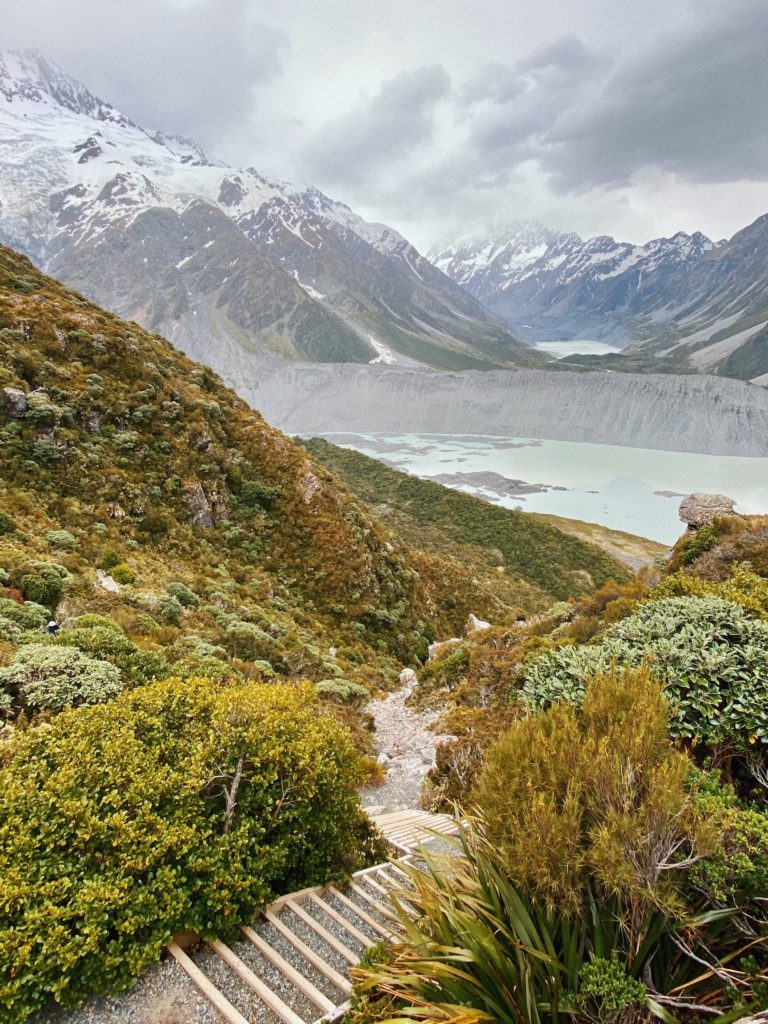
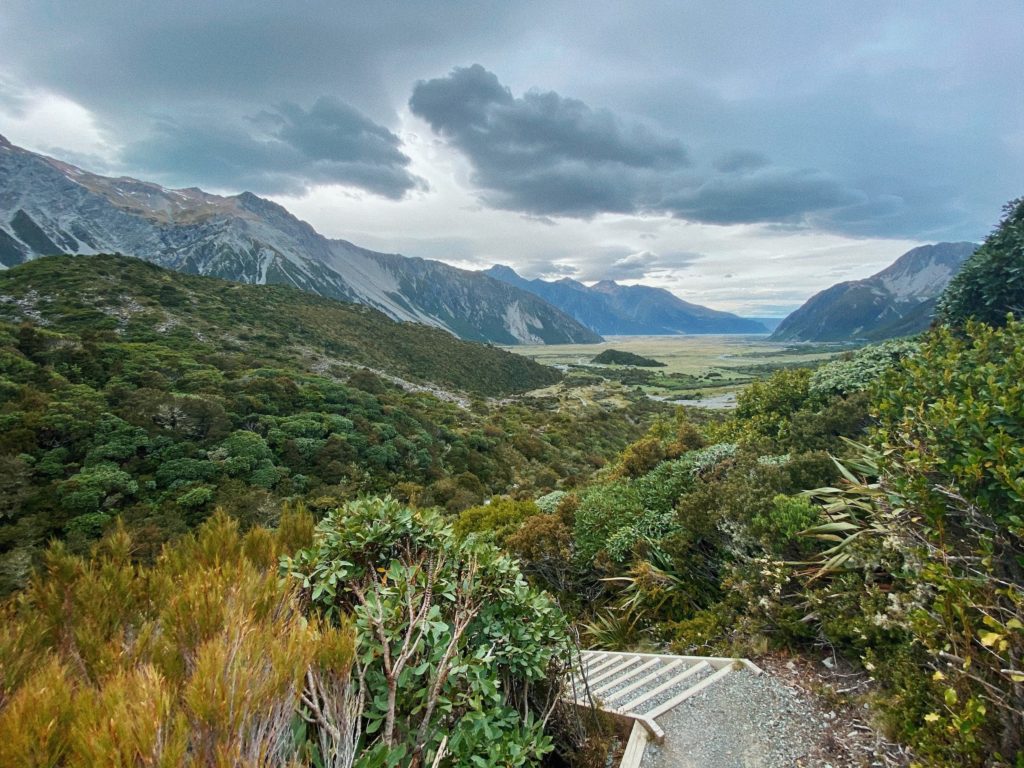
The first half of the Mueller Hut day hike is a seemingly endless stairway to heaven. With over 2,200 steps, this bit was tiring but definitely manageable, even with my questionable fitness level. I was awestruck at just how beautiful the views already were at this point — honestly, the views from the parking lot were already pretty dope.
The path going up is narrow at many points, but there is enough space for people to comfortably pass you. There are also plenty of places to stop and catch your breath when needed. Going up the stairs took me a solid 2 hours, which is about how long DOC says it will take.
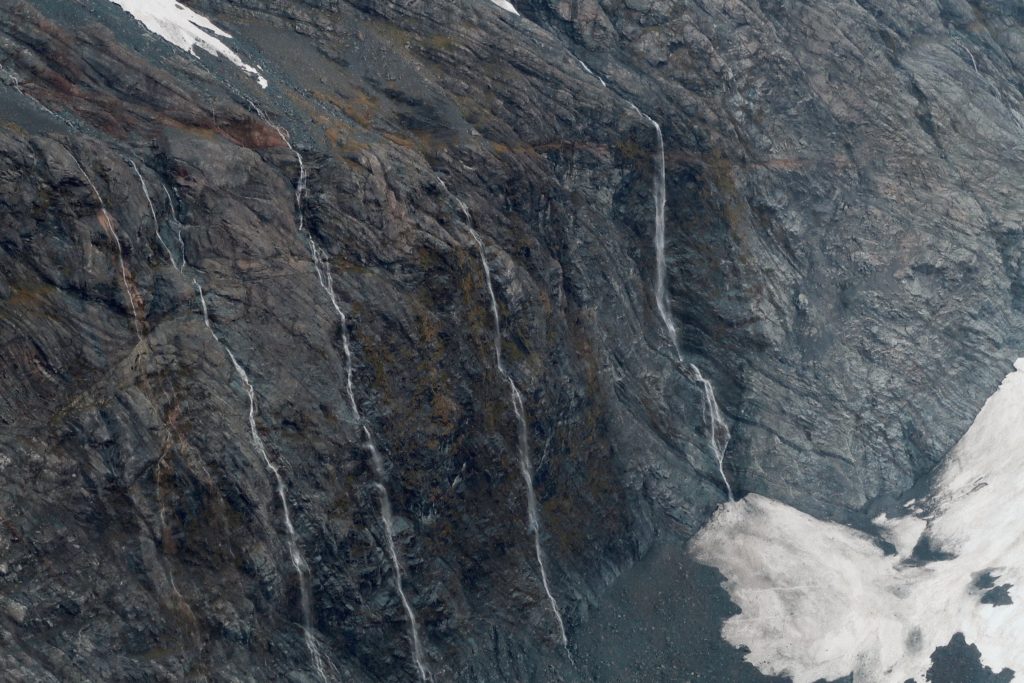
About halfway up the stairs, the weather started to turn. It started to drizzle a bit and I heard what was either a huge clap of thunder or an avalanche. My bad luck with weather when hiking and the intense 2-hour uphill walk caused me to stop and consider turning back several times. Being cold, wet, and alone on the top of a mountain didn’t sound ideal. I carried on, however, and I’m glad I did!
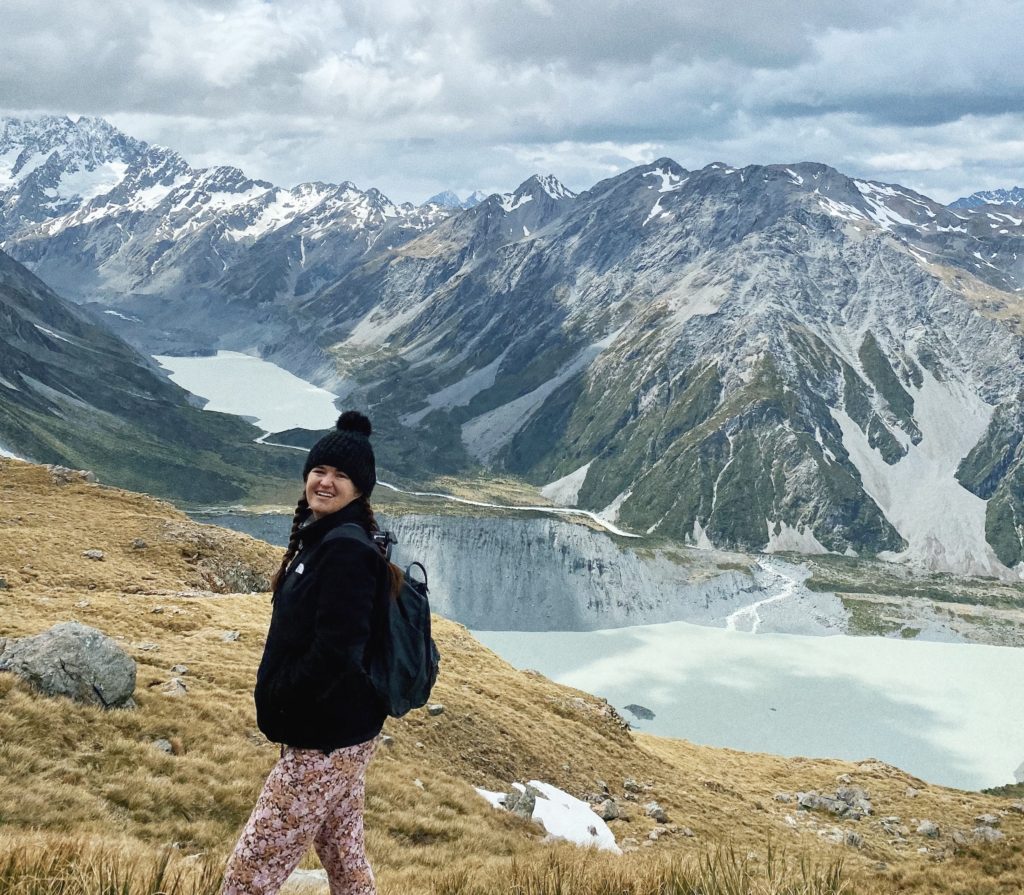
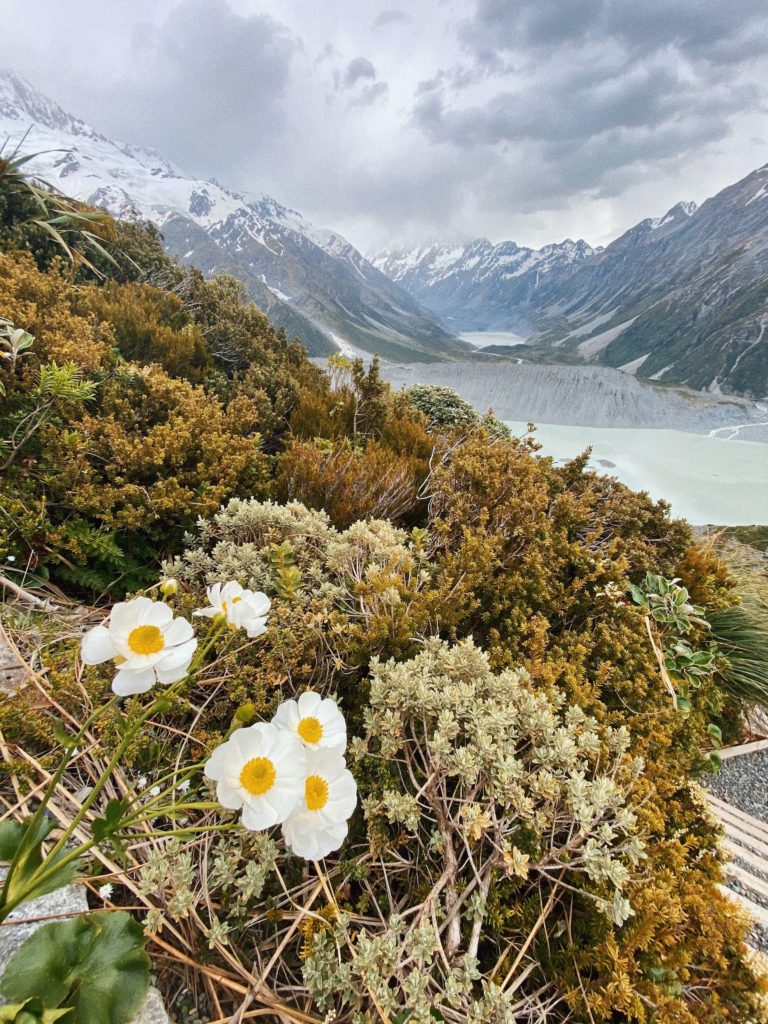
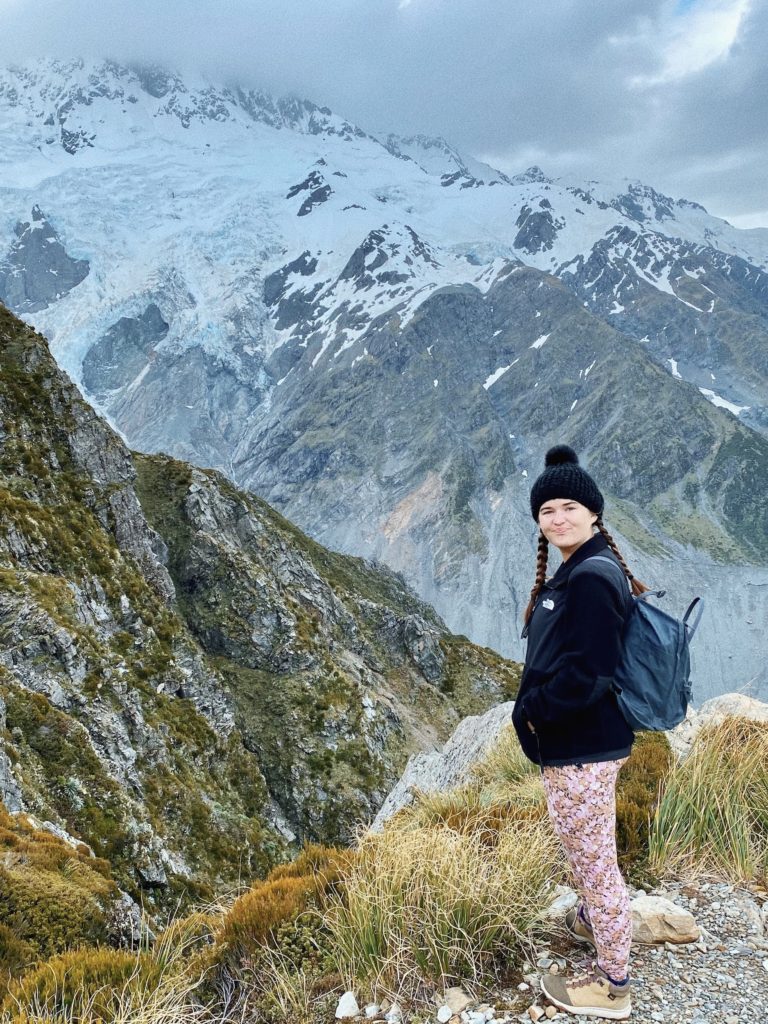
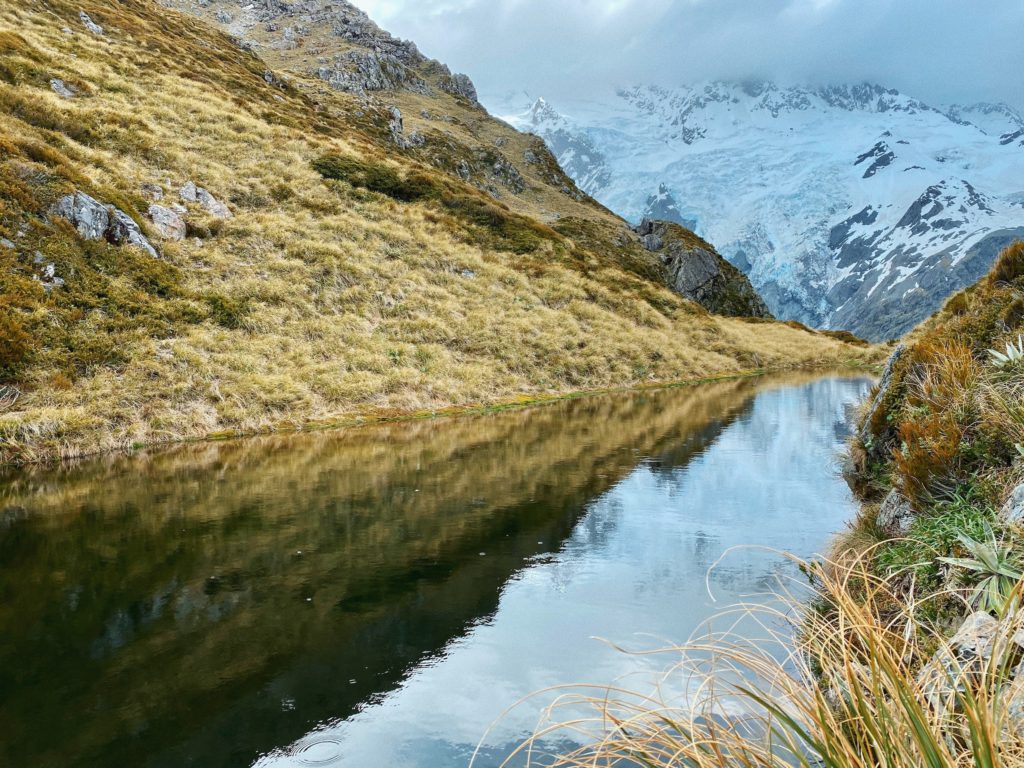
Just when I began thinking these damn stairs would never end, I made it to the halfway point: Sealy Tarns (a tarn is an alpine mountain lake that was formed by a glacier). It was seriously gorgeous. Between the glassy lake, snow-capped mountains, and views of the valley below, I felt like I could shed a tear. Mother Nature really is something!
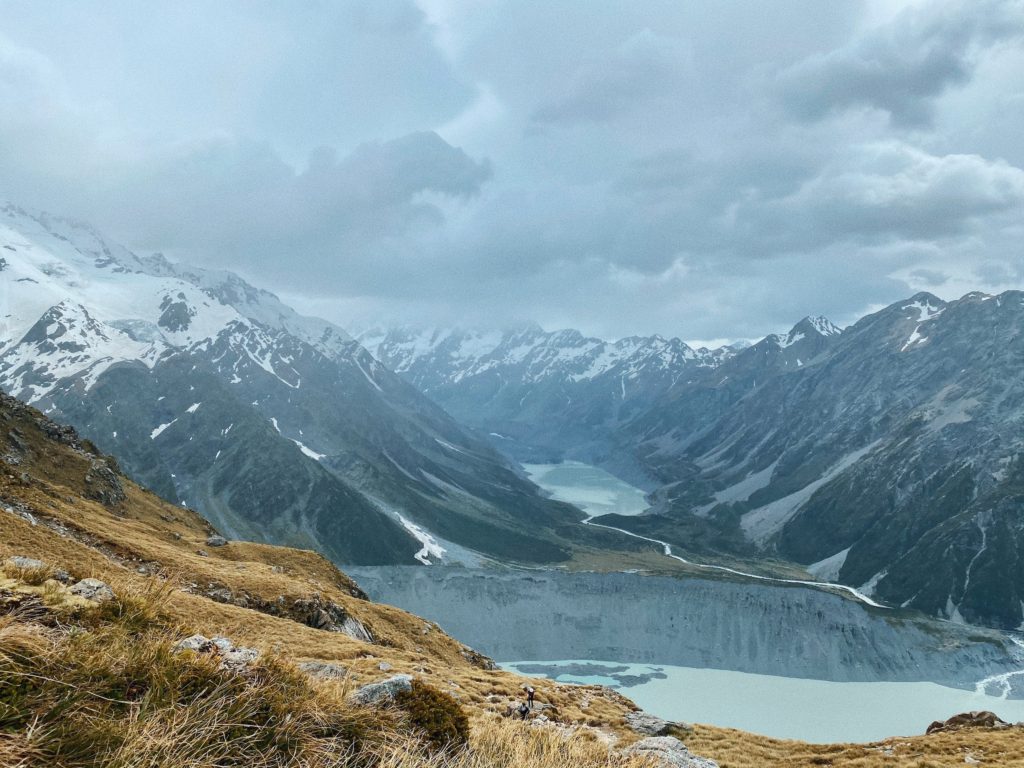
This area is a good place to stop and rest up for the next half of the hike. From here on up to the top, there will be steep uphills, scrambling over boulders, and lots of scree.
Mueller Hut day hike: Part 2
The second half of this hike is significantly more difficult than the first half. But I would also argue that it’s significantly more fun!
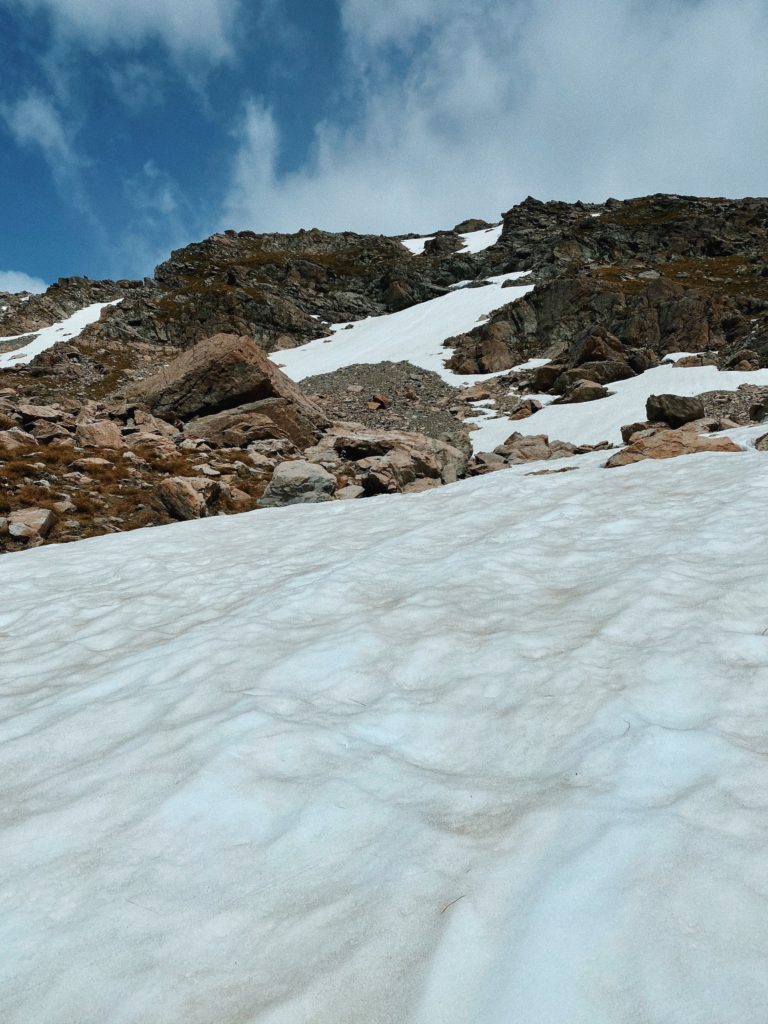
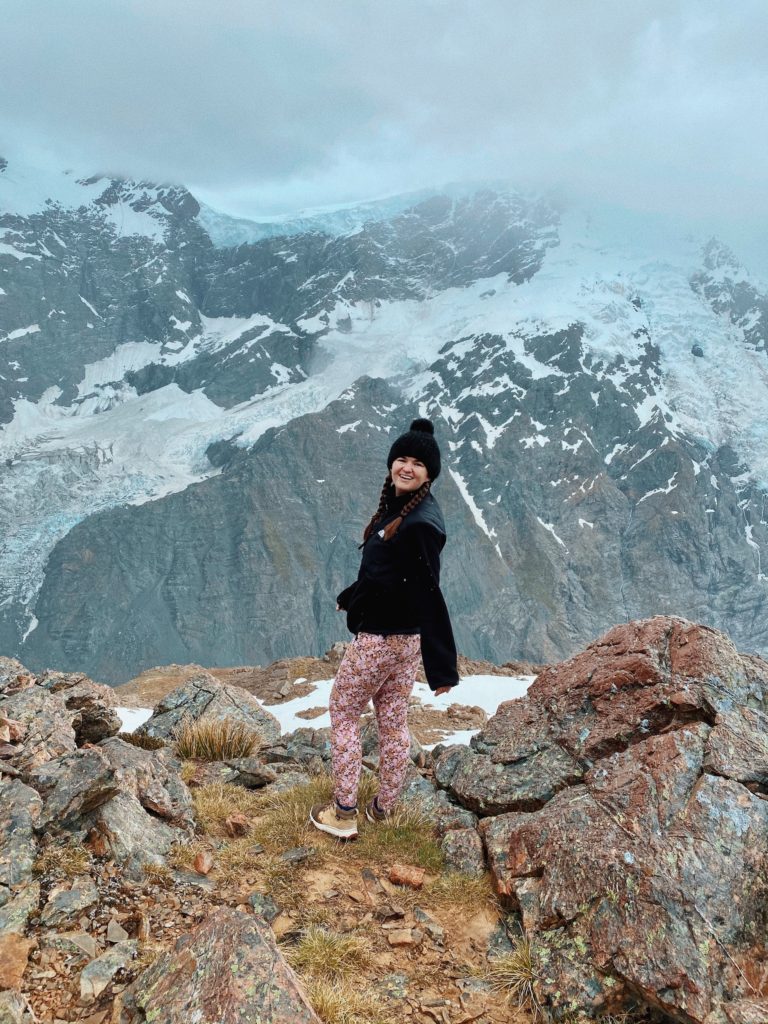
For about an hour, I walked uphill up a rocky path through a tussock-covered field. The path normally leads to a bunch of massive boulders that you have to scramble over. I was a bit surprised to find them all covered in snow! I was comically unprepared and kept falling through when I stepped, but eventually made it past.
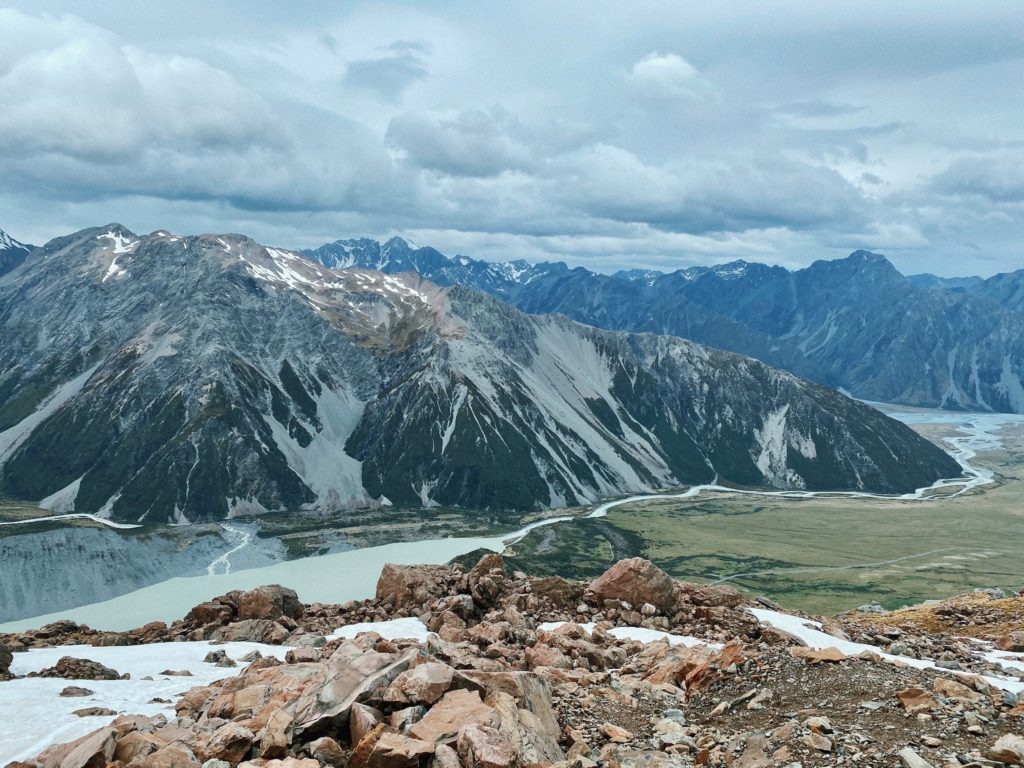
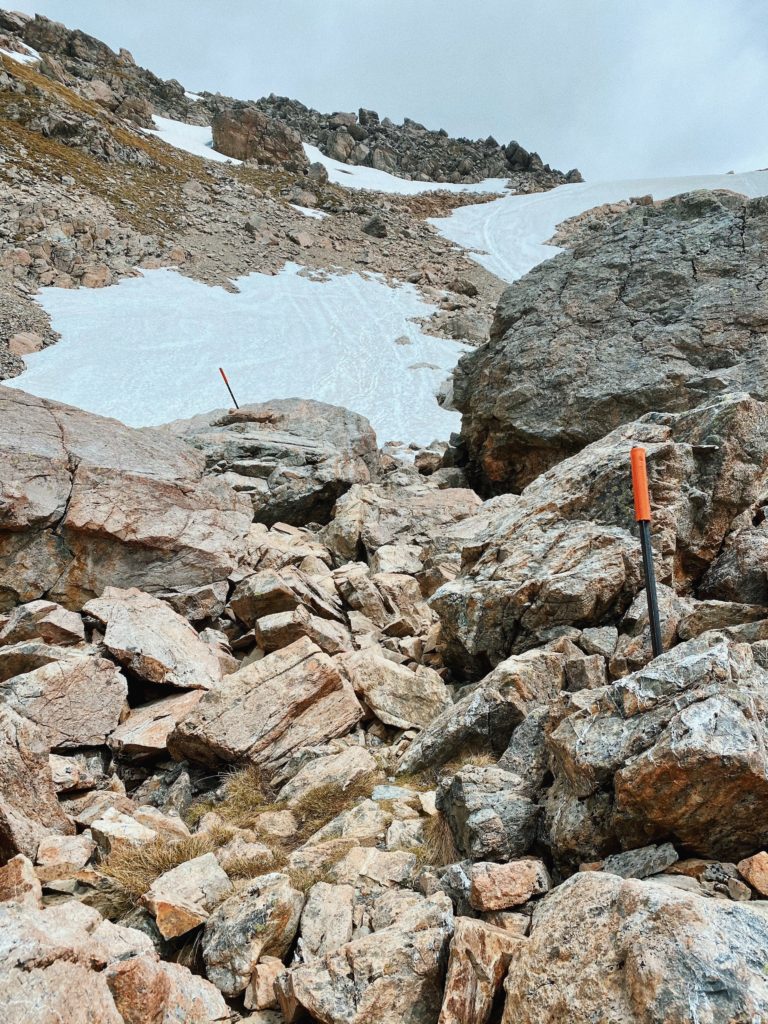
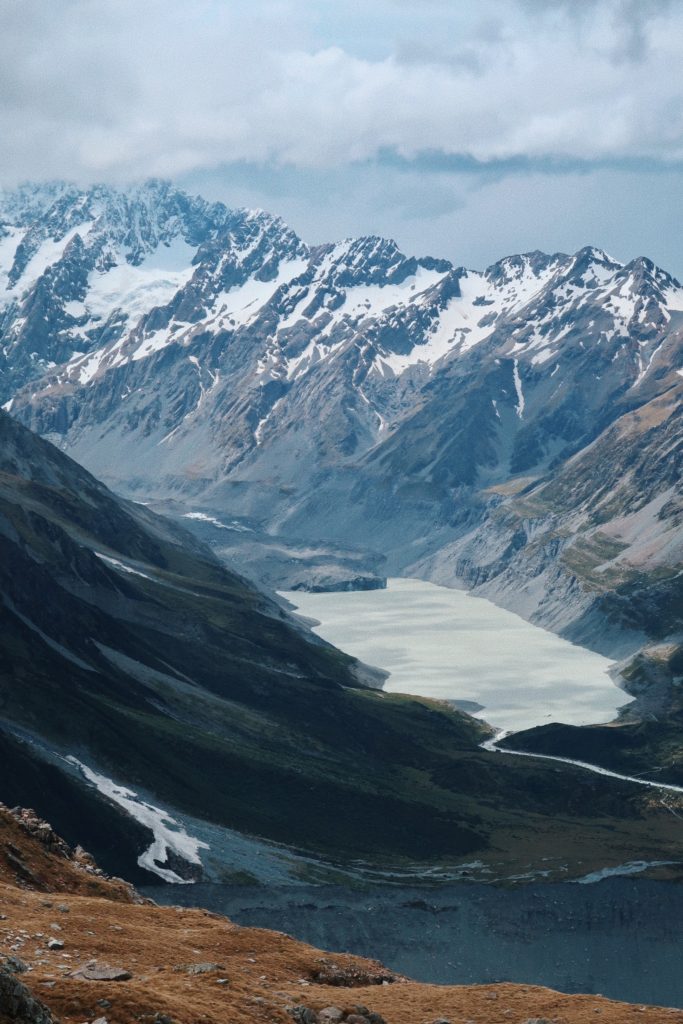
Afterward, I was met with the bane of my existence: scree, or tiny loose rocks. Because I didn’t have hiking poles, I climbed uphill on my hands and knees for about half an hour. I finally reached the ridge of the mountain and was face-to-face with Mt Sefton.
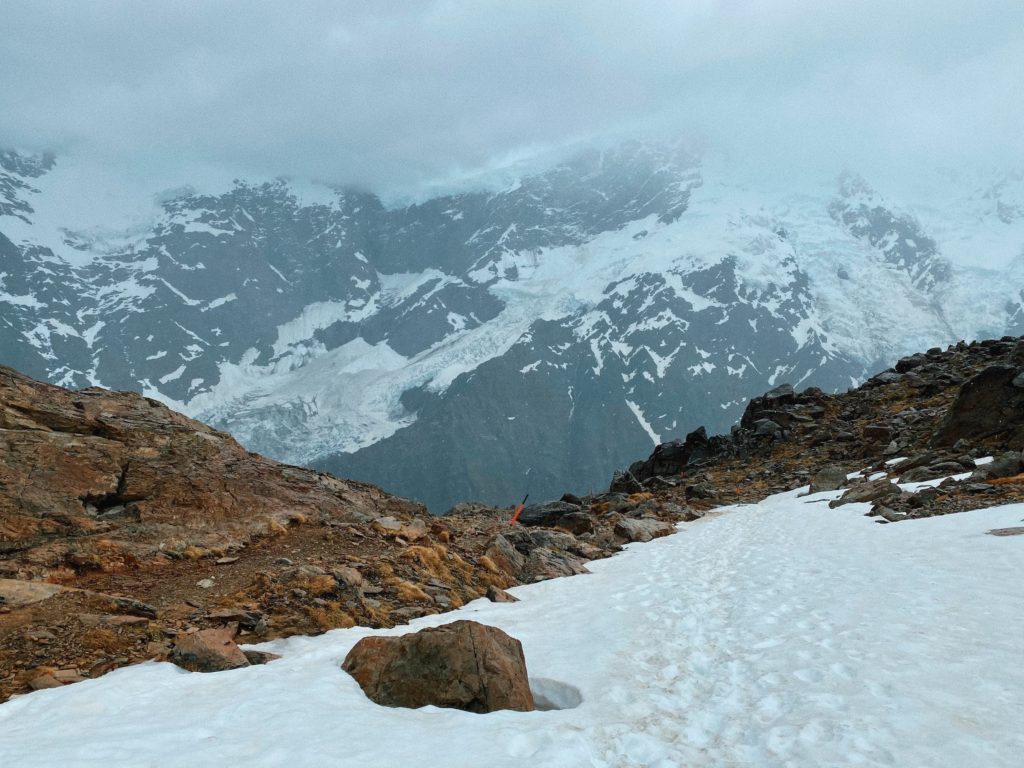
Along the ridge, there are orange markers sticking out of the ground to lead you to the hut. It’s about a 30-minute scramble over some more big rocks, but you’re going mostly flat instead of uphill. There was a ton of snow right before the hut, so I decided to turn around after taking a few pictures from afar. It took me 4 and a half hours total to make it to this point — I’m quite slow and stopped a lot for pictures and water.
Fun fact: the original Mueller Hut was built in 1914. The current hut is the fifth one by the same name because avalanches and harsh alpine conditions have brought the other ones down.
Going down
Going down was much less difficult than coming up. The first part coming down was the worst because all of the loose rocks were quite slippery (ugh, scree). Again, I often used my hands to crab-walk down as a precaution. No twisted ankles for Niki!
The paved stairs after Sealy Tarns came as a welcome relief after all of the steep downhill inclines and scrambles. It took me 2 hours to make it all the way down from the hut. The entire round trip took me 6 and a half hours to complete.
What to pack on the Mueller Hut day hike
- Hiking boots: Definitely wear a pair of comfortable hiking shoes that you’ve already broken in. Because the second part of the hike is over scree and small rocks, it’s important to wear shoes with some sort of ankle support.
- Plenty of layers: This was something I never truly appreciated until living in New Zealand. The weather here (especially in the mountains) can change very quickly. I was hot and sweaty at the beginning, but once getting past Sealy Tarns, it got very windy and cold.
- A warm hat: This came in really clutch when it started to drizzle. If you’re going in the dead of summer, you can exchange a warm hat for a hat that covers your face from the sun.
- Sunscreen: There really isn’t any shade on this track. Make sure to slather on that sunscreen and reapply often. New Zealand sun is no joke!
- Hiking poles: Not strictly necessary, but would help a lot over the loose rocks. It seemed like everyone I passed had these except me.
- Water bottle and snacks: You can fill up your water from the lake when you reach Sealy Tarns (it’s drinkable and delicious). I’d still recommend bringing at least 2L of water per person just in case. As for snacks, make sure to pack enough to satiate you for at least 12 hours. Better safe than sorry!
- Phone or camera: You’ll definitely want to take pictures! As for phone service, I was surprised at how good it was all the way up the mountain. My Skinny phone plan had service nearly the entire time.
Final thoughts
If you’re thinking of doing the Mueller Hut day hike, go for it!
Although I’m not the fittest person or skilled hiker, I got to the top (and back down) in one piece. And it was incredible! The views are amazing all the way through and make all the blood, sweat, and tears worth it.
Keep in mind — if you’re looking for a quick, easy hike, this ain’t it. Despite the short distance on paper, this track is uphill for about 95% of the way. It is hard! If you’re not confident in your hiking ability, consider breaking it up into two days by staying in the hut overnight. Your sore legs will thank you!
Alternative South Island day hikes
Already conquered Mueller Hut? Here are some alternative options in the area with equally stunning views.
- Roys Peak Track, Wanaka — hard
- Isthmus Track, Wanaka — hard
- Ben Lomond Track, Queenstown — hard
- Greta Track, Lake Ohau — moderate
- Red Tarns, Aoraki/Mt Cook National Park — moderate
- Bob’s Cove, Queenstown — easy
Thanks for reading!
xoxo Niki
Pin this post to save it for later!
 Flights | I start my search on Google Flights, then usually book directly with the airline so I’m protected in case anything goes wrong.
 Accommodation | Booking.com is my go-to for booking accommodation. They have an awesome cancellation policy and a super easy-to-use website.
 Activities | GetYourGuide is my all-time favorite site to book day tours and activities because their cancellation policy is unmatched. Viator is another great option, especially for multi-day trips and tours.
 Luggage | Carry-on only or bust! I use my Fjallraven Kanken backpack on just about every trip I take. I also love Beis for carry-on suitcases, weekender bags, and makeup/toiletry cases.
 Photography | I use my iPhone 12 Pro, a Canon G7x Mark ii, and a DJI Mini 2 drone for all of my photos and videos. I also edit my photos in Lightroom.